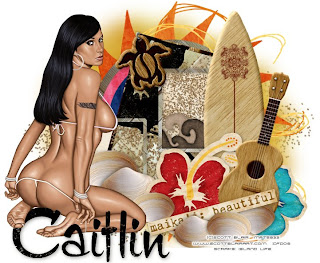
Here Comes The Sun

Supplies Needed:
Tube of choice. I am using the stunning work of Scott Blair.In order to use his work you must have a license to do so from My PSP Tubes
Scrap Kit Island Life by Sara Amarie at Sweet Shoppe Designs
Here Comes The Sun Template by Me at Cupcake Sprinkles
Font of choice.
I used Charade JF
1. Open all supplies in PSP
2. Open a 700x650 canvas (we will resize later) and flood fill white.
3. On my Template - Click on the background sun layer - Copy - Paste as new layer - Selections - Select all - Float - De float.
4. Open paper or - Image - Resize 20% smart size - Copy - Paste as new layer. Click on your large background sun layer - Selections - Invert - Delete your paper layer - Selections - Select none. Delete your template sun background.
5. On my Template - Click on the large black circle - Copy - Paste as new layer - Selections - Select all - Float - De float.
6. Open the woven mat in your elements folder - Image - Resize 30% smart size - Copy - Paste as new layer. Click on your frame background layer - Selections - Invert - Delete your woven mat layer - Selections - Select none. Delete your template background.
7. On my Template - Click on the small white circle - Copy - Paste as new layer - Selections - Select all - Float - De float.
8. Open pnk paper - Image - Resize 15% smart size - Copy - Paste as new layer. Click on your small circle layer - Selections - Invert - Delete your paper layer - Selections - Select none. Delete your template circle. I added a subtle drop shadow to this layer to make it pop out some.
9. On my Template - Click on the small black circle - Copy - Paste as new layer - Selections - Select all - Float - De float.
10. Open bl paper - Image - Resize 15% smart size - Copy - Paste as new layer. Click on your small circle layer - Selections - Invert - Delete your paper layer - Selections - Select none. Delete your template circle.
11. On my Template - Click on the large frame background - Copy - Paste as new layer - Selections - Select all - Float - De float.
12. Open the woven mat in your elements folder - Image - Resize 30% smart size - Copy - Paste as new layer. Click on your frame background layer - Selections - Invert - Delete your woven mat layer - Selections - Select none. Delete your template background.
13. On my Template - Click on the large frame - Copy - Paste as new layer - Selections - Select all - Float - De float.
14. Open the charm flower in your elements folder - Image - Copy - Paste as new layer - Continue to duplicate it as many times to get the flower to be the "paper" of the frame.
• I duplicated mine 3 times •
Click on your frame layer - Selections - Invert - Delete each of your charm flower layers - Selections - Select none. Delete your template background.
15. Now I added the black hibiscus stamp and some shells to add something inside the larger frame background. You can add what ever you choose but I did this now so I could merge a few layers so there wouldn't be so many on my pallette.
16. If you added embellishments close off all layers except the large background, frame and your chosen bits and merge visible. Un - x all layers now so you can see what you're working with.
17. On my Template - Click on the small frame background - Copy - Paste as new layer - Selections - Select all - Float - De float.
18. Open the journal block in your elements folder - Image - Resize 55% smart size - Copy - Paste as new layer. Click on your frame background layer - Selections - Invert - Delete your journal block layer - Selections - Select none. Delete your template background.
19. On my Template - Click on the small white frame - Copy - Paste as new layer - Selections - Select all - Float - De float.
20. Open the woven box in your elements folder - Image - Resize 35% smart size - Copy - Paste as new layer. Click on your frame background layer - Selections - Invert - Delete your woven box layer layer - Selections - Select none. Delete your template background.
21. Add a bit of embellishments in your small boxes and once happy x out all layers except the small background, frame and embellishments. Right click and then merge visible once happy un-x all layers.
22. Now add your tube and place it where you think it looks best. Once happy add any embellishments of choosing to your tag.
23. Once happy merge all layers and save as a .jpeg.


No comments:
Post a Comment