Spread Your Wings and Fly

Supplies Needed:
1 tube of choice. I am using the stunning work of Zindy S.D. Nielsen.You must have a license to use her work which can be obtained HERE
Weescotslass Mask #214 from Chelle's fab site HERE
* Thank you Chelle *
* Thank you Diane *
Xero Filter Porcelien
Font of choice.
I used Will & Grace which can be downloaded HERE
1. Open up your supplies in your psp program.
2. Open a 700x650 canvas (we will resize later) and flood fill white.
3. Open Frame 1 - Copy - Paste as new layer. Image - Free rotate - Right 10. (Make sure all layers is not checked) Right click - Duplicate frame layer - Image mirror.
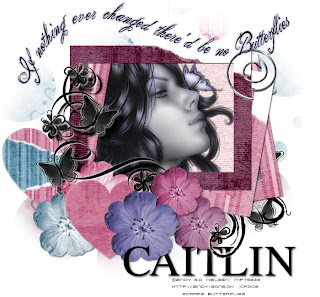
4. Open Frame 3 - Copy - Paste as a new layer. Move the 2 bottom frame layers around to appear as though they are slightly scattered below the top frame. (See my tag for reference)5. Click on your top frame layer Grab your selection tool and draw a square around the center of your frame.
Once you've got your square double click left to get the marching ants going around.
6. Open Paper 4 - Copy - Paste as new layer. Slide below your top frame layer but above your two other frames.
7. Selections - Invert - Delete. Do not Deselect! (All excess paper should now be gone)8. Click on the tube you have chosen to use. Copy - Paste as new layer. Move tube layer on top of your Paper 4 layer but below your top frame layer. With your tube layer still active click Delete.
(Any excess tube showing outside the frame should now be gone)
Selections - Select none.
9. Still working with your tube layer Effects - Plug Ins - Xero - Porcelien - Apply default settings. Add a subtle dropshadow.
10. X out your background layer and Layers - Merge - Merge visible.
12. Un X your background.
13. Now we want to apply some embellishments. I used the stitched hearts each resized a different size as well as the flowers. Get creative with your embellishments and use your imagination. The sky is the limit.
14. Once happy with your embellishments X out your background layer. Layers - Merge - Merge visible.
15. Un - X your background layer.
16. Open the Circles Paper. Copy - Paste as new layer.
17. Apply WSL Mask#214. Right click mask layer - Merge group. Slide below your merged layer.
18. Open up your Butterfly Word Art. Choose which saying you would like to use. Copy - Paste as new layer. Move to the top of your tag.
19. Add your name to your tag and place to your liking.
20. X out your background layer. Layers - Merge - Merge visible. Add a subtle dropshadow to your merged layer.
21. Un - X your background layer and apply your © information.
22. Layers - Merge - Merge all layers.
23. Crop tag to size and save as a .jpeg.


No comments:
Post a Comment